
Connect your coding agent
Install the SpringRoll skill with the command below. On the first live call, sign in through the browser, choose your workspace and authorize your agent. Check the workspace before deploying.
OAuth-capable MCP clients can connect directly to /api/mcp. Public discovery describes available tools and manifest requirements; workspace actions require authentication.
npx skills add springroll-dev/springroll-skill --skill springrollConnect your coding agent with MCP
Choose your client to configure and authorize the SpringRoll MCP endpoint yourself.
Terminal. One command, then authorize.
- 01
Add SpringRoll
Run this once, from anywhere.claude mcp add --transport http springroll https://springroll.dev/api/mcp
Then start Claude and authorize. Your browser opens by itself./mcp
- 02
Authorize
Choose your organization in the browser and approve the connection. No credential is exposed for you to store.
- 03
Deploy
Ask the agent to register, validate, and deploy the project.
Prepare this project for SpringRoll. Read the Company Blueprint, inspect my source and discover supported workloads and services. Check the build, workspace, owner and deployment workflow; show the exact deployment proposal for confirmation, then follow the build to its actual result.
Also claude.ai. Added as a custom connector.
Custom connectors are a paid feature on Claude: Pro, Max, Team, or Enterprise.
- 01
Add SpringRoll
Open Settings, then Connectors.
Choose Add custom connector.
NameSpringRoll
URLhttps://springroll.dev/api/mcp
Save, then connect. Claude opens this authorization page itself.
- 02
Authorize
Choose your organization in the browser and approve the connection. No credential is exposed for you to store.
- 03
Deploy
Ask the agent to register, validate, and deploy the project.
Prepare this project for SpringRoll. Read the Company Blueprint, inspect my source and discover supported workloads and services. Check the build, workspace, owner and deployment workflow; show the exact deployment proposal for confirmation, then follow the build to its actual result.
Web. Needs developer mode turned on first.
Availability depends on your ChatGPT plan and workspace settings. Use the public ChatGPT endpoint above; ChatGPT must be able to reach it over the internet. Deploy your own repository or uploaded project.
- 01
Add SpringRoll
In Settings, open Connectors, then Advanced settings, and turn on Developer mode.
Back in Connectors, choose Create.
NameSpringRoll
MCP server URLhttps://springroll.dev/api/mcp/chatgpt
AuthenticationOAuth
Create, then authorize. The connector appears under Developer mode in the composer.
- 02
Authorize
Choose your organization in the browser and approve the connection. No credential is exposed for you to store.
- 03
Deploy
Ask the agent to register, validate, and deploy the project.
Prepare this project for SpringRoll. Read the Company Blueprint, inspect my source and discover supported workloads and services. Check the build, workspace, owner and deployment workflow; show the exact deployment proposal for confirmation, then follow the build to its actual result.
Terminal. The CLI finds the authorization server itself.
- 01
Add SpringRoll
Run this once. Codex probes the URL, sees it supports OAuth, and opens your browser.codex mcp add springroll --url https://springroll.dev/api/mcp
The entry is written to ~/.codex/config.toml. Add it inside a project to scope it to that project instead.
- 02
Authorize
Choose your organization in the browser and approve the connection. No credential is exposed for you to store.
- 03
Deploy
Ask the agent to register, validate, and deploy the project.
Prepare this project for SpringRoll. Read the Company Blueprint, inspect my source and discover supported workloads and services. Check the build, workspace, owner and deployment workflow; show the exact deployment proposal for confirmation, then follow the build to its actual result.
Editor and CLI. One project file, then OAuth login.
- 01
Add SpringRoll
Create .cursor/mcp.json in your project. Cursor and Cursor Agent both read this file.
.cursor/mcp.json{"mcpServers":{"springroll":{"url":"https://springroll.dev/api/mcp"}}}Authorize SpringRoll from Cursor Agent. Your browser opens for organization approval.cursor-agent mcp login springroll
- 02
Authorize
Choose your organization in the browser and approve the connection. No credential is exposed for you to store.
- 03
Deploy
Ask the agent to register, validate, and deploy the project.
Prepare this project for SpringRoll. Read the Company Blueprint, inspect my source and discover supported workloads and services. Check the build, workspace, owner and deployment workflow; show the exact deployment proposal for confirmation, then follow the build to its actual result.
One URL. Nothing else to configure.
- 01
Add SpringRoll
Remote MCP endpointhttps://springroll.dev/api/mcp
Any MCP client that speaks streamable HTTP can be pointed straight at this URL. It still opens a browser to authorize. The endpoint advertises its own authorization server, so the URL is the only thing to configure.
Clients that register a private-use redirect scheme without a dot in it are refused at registration. Use a client path with an HTTPS, loopback, or reverse-domain callback.
- 02
Authorize
Choose your organization in the browser and approve the connection. No credential is exposed for you to store.
- 03
Deploy
Ask the agent to register, validate, and deploy the project.
Prepare this project for SpringRoll. Read the Company Blueprint, inspect my source and discover supported workloads and services. Check the build, workspace, owner and deployment workflow; show the exact deployment proposal for confirmation, then follow the build to its actual result.
Publish an app
With the skill installed, ask your agent to deploy with /springroll deploy. If you connected MCP manually, ask the agent in plain language to prepare and deploy the project. SpringRoll records the application and release, then starts a build. Follow the deployment in the app overview.
Direct to Production is the default. Required checks still apply. A Tenant Admin can configure staged Development, UAT and Production when a human review is required. Read the selected workflow before assuming the first link is a preview.
Wait for READY, then open the working app. Verify its core task, release and intended environment before sharing. A build result and a working application are separate checks.
Share the working app
Set the audience before sending a SpringRoll link. A colleague signs in to the workspace and the portal checks launch access for that environment. Ask a colleague outside the audience to try the link, then test the direct provider URL separately.
From the app overview, choose Copy app link. Check who can open it beside the link. Copying a link does not change permissions; use Access to manage the audience.
Production and Test links are labelled separately. A Public app page introduces an app with images and a description; publishing it does not change access to the running app.
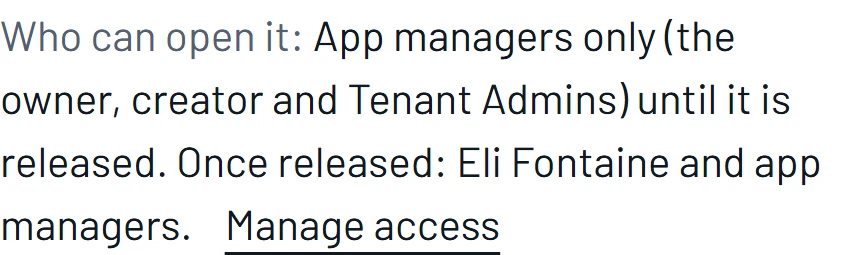
Example workspace · Development preview. Check Production and Test audiences separately. Copying a link does not change access.
API and MCP reference
Use /docs/api for authentication, rate limits, versioning and errors. /openapi.json describes REST endpoints, and /api/v1/capabilities lists tools and manifest requirements.
These public pages also support Markdown through Accept: text/markdown. /llms.txt is an index and /llms-full.txt contains selected complete references with links to every document. These formats help agents read the same content; they are not a ranking or inclusion guarantee.
Choose a good first app
Start with a static app, or an app whose build and runtime fit managed Vercel or Cloudflare. The example collection includes dependency-free static apps you can try and deploy from the browser.
- Static HTML, CSS and JavaScript: provide the build command and output folder. These examples use npm run build and dist.
- Apps with a server: have your agent check the framework, build command, runtime, environment variables and external services before deploying.
- Background workers, long-lived connections or persistent local files: ask the team to review the runtime design before choosing a deployment target. Use shared storage or a database for team records.
Launch an app with your team
Name the owner, verify the release and test the launch link with an intended colleague and an unapproved account.